
A Beginner-Friendly Look at This Bold, Expressive Printmaking Artform
Linocut is one of the most inviting and versatile printmaking techniques, loved by artists for its bold lines, strong contrasts, and hands‑on creative process. Whether you’re a seasoned printmaker or simply curious about how handmade prints come to life, linocut offers a wonderful blend of craftsmanship, experimentation, and expressive mark‑making.
The Basics: How Linocut Works
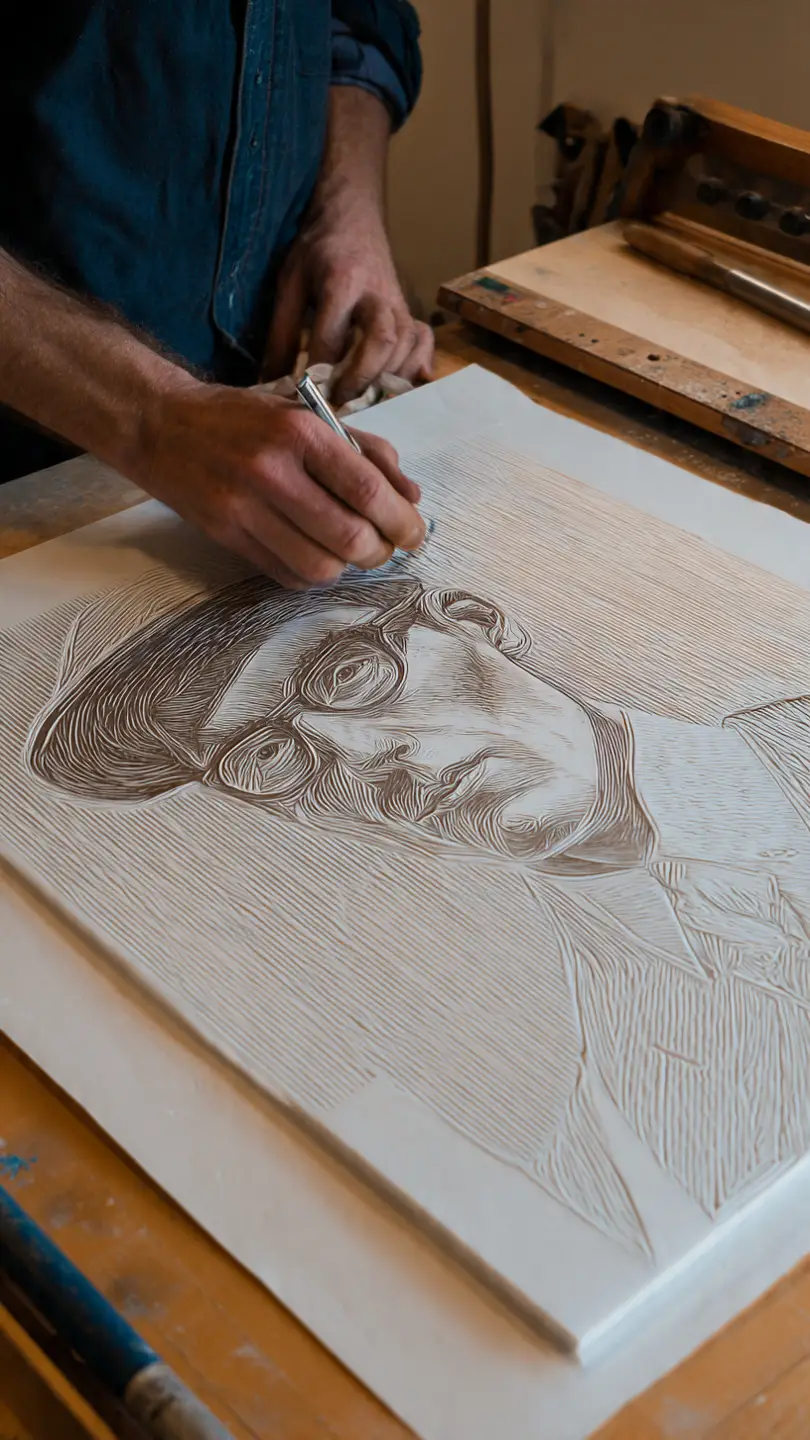
A linocut is a relief print. That means the artist carves into a block of linoleum to create a raised surface. The raised areas will hold ink; the carved-away areas will remain the colour of the paper.
Here’s how the process typically unfolds:
- Design the artwork – The image is sketched directly onto the lino block or transferred from a drawing.
- Carve the block – Using V‑ and U‑shaped gouges, the artist cuts away the parts that should not receive ink.
- Ink the surface – A brayer (roller) coats the raised areas evenly with ink.
- Print the image – Paper is pressed onto the inked block, either by hand burnishing or using a press.
- Lift and reveal – The magic moment: the print is peeled off to reveal the reversed image.
Why Linocut Is So Popular
Linocut emerged as a modern alternative to woodcut in the early 20th century. Linoleum is softer and easier to carve than wood, making it accessible for beginners and expressive for experienced artists. Some of the reasons artists love linocut include:
- Ease of carving – Linoleum offers smooth consistency with no wood grain to fight against.
- Bold, graphic results – Clean lines and strong contrasts make for striking images.
- Affordability – The tools and materials are relatively inexpensive.
- Edition printing – Once the block is carved, it can produce multiple identical prints.
- Creative flexibility – Artists can work in single colour, layered colour, reduction printing, or combine it with mixed media.
Different Types of Linoleum Used
While traditional battleship grey lino is a classic choice, artists now have options:
- Soft-cut or vinyl sheets – Easier on the hands, ideal for beginners.
- Mounted lino blocks – Laminated to wood for stability.
- Specialist printmaking lino – Designed for consistent carving and ink absorption.
Techniques Within Linocut
Linocut can be as simple or complex as the artist chooses:
- Single‑colour prints – One block, one ink colour.
- Reduction printing – A single block carved in stages to build up layered colours. Each carving “reduces” the block, so the edition cannot be reprinted.
- Multiple-block printing – Different blocks printed in different colours.
- Experimental methods – Chine‑collé, hand‑colouring, texturing, and more.
What Makes Each Linocut Unique
Even in a consistent edition, each print carries the subtle marks of the handmade process — tiny variations in ink application, pressure, and paper placement that give the work its tactile charm. For many collectors, this individuality is part of linocut’s beauty.
Linocut in Today’s Art World
From fine art studios to home printmaking setups, linocut continues to thrive. Contemporary artists use it to explore narrative, abstraction, pattern, and texture. It’s also enjoying renewed popularity thanks to DIY printmaking communities, small‑batch makers, and print fairs celebrating the craft.
A Creative Invitation
If you’ve ever wanted to try printmaking, linocut is a wonderfully approachable starting point. With just a block, a few tools, and some ink, you can create bold, expressive prints that capture your own artistic style.
And once you lift that first print off the block — you might just fall in love with the process
What you’ll need to start
Linocut Materials:
1. Linoleum Block
Traditional grey linoleum
Soft-cut or vinyl sheets (easier for beginners)
Mounted lino blocks (laminated to wood for stability)
2. Carving Tools (Gouges)
V-shaped gouges (for fine lines)
U-shaped gouges (for wider cuts)
Set of interchangeable or fixed handles
3. Ink
Water-based or oil-based printing ink
Multiple colours if doing layered or reduction printing
4. Brayer (Roller)
Smooth rubber brayer for evenly applying ink
Smaller brayers for detail areas
5. Inking Surface
Plexiglass, glass, or a flat non-porous plate to roll out ink
6. Paper
Printmaking paper (e.g., Japanese rice paper, cotton rag paper)
Cardstock for practice prints
7. Printing Tools
Baren or wooden spoon (for hand burnishing)
Printing press (optional, for even pressure)
8. Additional Supplies
Pencil and eraser (for sketching the design)
Tracing paper (optional, for transferring designs)
Bench hook or non-slip mat (to secure the block while carving)
Protective gloves and apron
Paper towels or rags for cleanup